How to sync iPhone to Mac – Full Guide
How to sync iPhone to Mac – Full Guide:
Table of Contents
In today’s modern age, mobile devices have become an essential part of our daily lives. Among them, the iPhone from Apple holds a special place in the hearts of millions of people worldwide. Using an iPhone is not limited to calling and browsing. Still, it also extends to keeping your files, critical data, and even the applications you need at your fingertips all the time and everywhere. To help you achieve this goal, the sync technology comes with your Mac.
This article will explore how to sync your iPhone to your Mac efficiently and effectively. We will provide you with clear steps and valuable tips to ensure that all your data and files stay safe and up to date on your devices. We will also explain why this process is necessary and how syncing your iPhone to your Mac can make your digital life more manageable and smoother.
In today’s world, where we are always connected to the Internet and depend on smart devices for various purposes, it is essential to know how to make the most of our devices and integrate them. If you own an iPhone and a Mac, this article will be your comprehensive guide to using them simultaneously to make your digital life more efficient and accessible. Let’s start our journey in the sync world between iPhone and Mac.
Previously, it was a regular practice to sync an iPhone with a Mac to transfer data, files, and apps. However, most of these things can now be synced automatically.
Linked: How to activate Truecaller on iPhone
How to sync iPhone to Mac
Previously, syncing your iPhone with a Mac or Windows PC required manual intervention. However, this process has become less common after the arrival of iCloud and its gradual integration into our daily lives. Nowadays, you don’t have to connect your phone to your Mac to share data, as most things are automatically synced via iCloud.
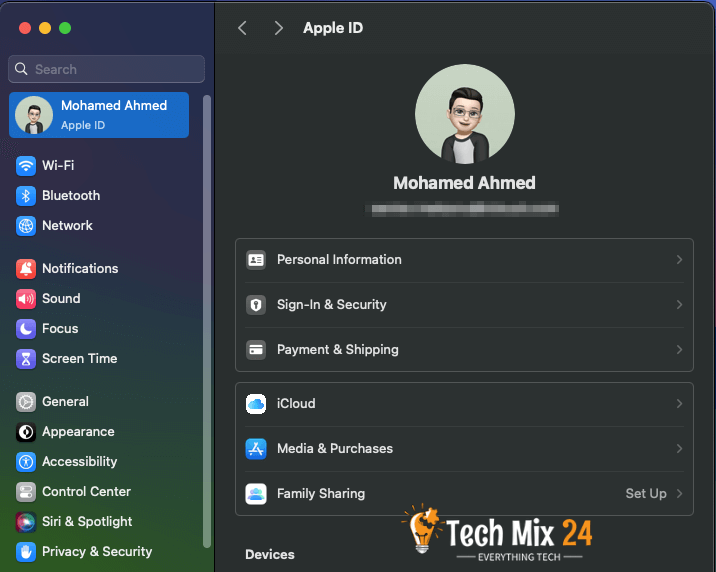
To activate this function, you must sign in with the same Apple ID on your iPhone and Mac. To ensure that you are signed in to the same account, go to your iPhone’s Settings or System Settings on your Mac and verify that the name and photo displayed at the top of the list are identical.
Most basic applications use iCloud as a cloud storage medium, enabling them to transfer changes to all connected devices automatically. For instance, if you edit a contact or add a new task in the Reminders app on your iPhone, the changes will automatically reflect in the respective macOS apps.
To make sure that your apps are connected to iCloud and syncing data across your devices, follow these steps:
- On your iPhone, go to Settings; on your Mac, go to System Settings.
- Look for the iCloud section under your name and click on it.
- Check if all the apps you want to use iCloud for syncing are turned on. If an app is turned off, it won’t be able to use iCloud to store or sync data. But when you enable it, the data on your device will be merged with iCloud automatically.
- You’ll find apps from Apple like GarageBand and iMovie at the bottom of the list. Below that, you’ll see third-party apps that you’ve downloaded from the App Store.
By completing these simple steps, you can ensure that all your apps are synced up with iCloud, and you can access your data across all your devices without any hassle.
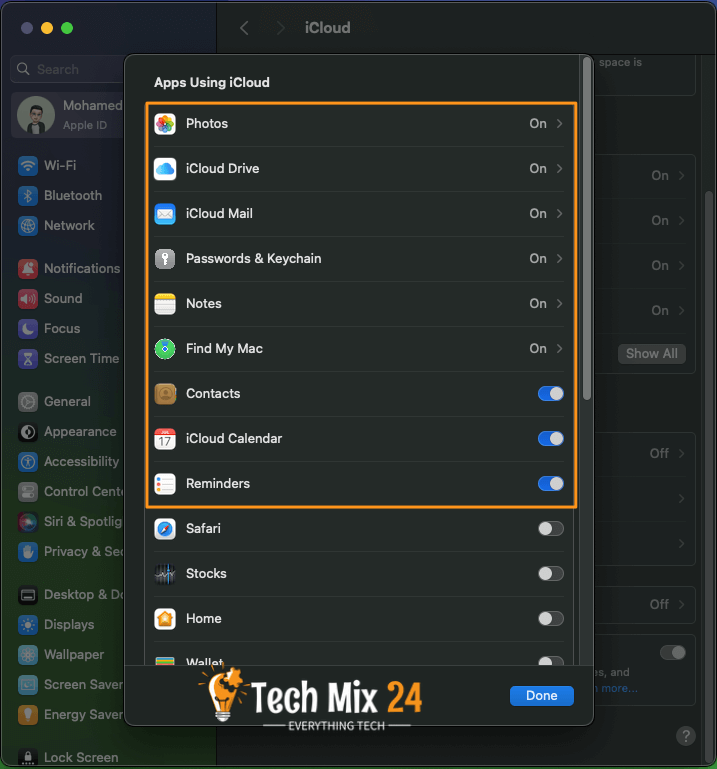
Certain apps, including Notes, allow segregating your data using the “On My iPhone” and “On My Mac” storage choices. This could be one reason some users might be unable to sync their Apple Notes via iCloud. If you opt for these settings, your data will be stored locally and not synced with iCloud automatically.
However, other settings and data can be successfully synced via iCloud. For instance, passwords stored in iCloud Keychain, Wi-Fi credentials, Safari tabs, and Apple Health data can be accessed on all devices associated with the same iCloud account without additional steps. This indicates that all linked devices can effortlessly access crucial and sensitive information.
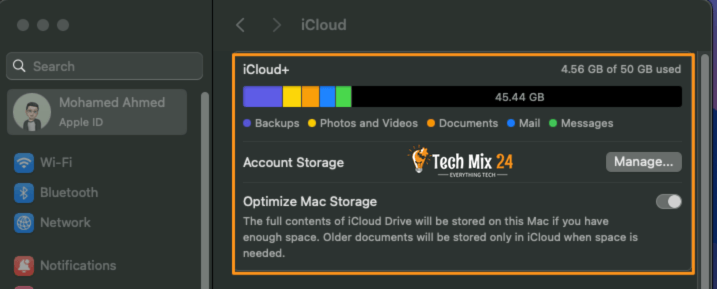
It’s common for iCloud to get filled with data, and the default storage space is only 5GB. However, some types of data, such as device settings, passwords, contacts, reminders, calendars, and health data, are exempted from this limit. To check how much Storage you’re using, navigate to System Settings, click on your name, then iCloud, and finally, Manage Storage.
Sync and backup manually using Finder on Mac
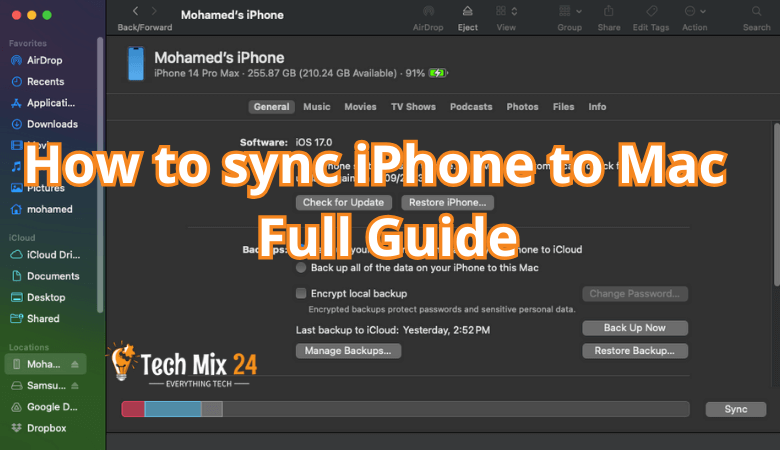
Before the release of macOS Catalina, iTunes was the go-to app for syncing data between an iPhone and a computer. In macOS Mojave, iTunes was still present; however, all syncing tasks are now integrated within Finder since the release of Catalina. The syncing process remains almost identical; the only difference is that the iPhone can be found in the Finder sidebar, eliminating the need to launch iTunes.
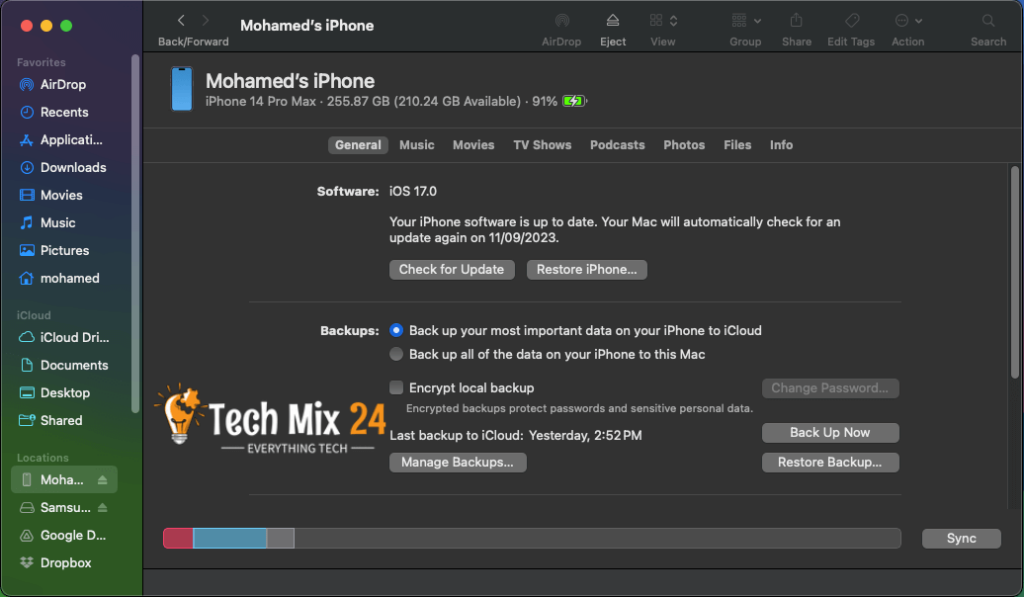
To link your iPhone to your Mac, use a suitable cable and grant access when requested on both devices. Next, open Finder and select your newly connected iPhone from the Places panel in the sidebar.
In the General tab, you can update and restore your iPhone, create local backups, and more. Creating local backups is a great reason to plug in your device since they can be quickly restored. This is especially useful if you reset your iPhone to solve an issue.
The other tabs contain options to sync music, movies, TV shows, podcasts, books, photos, and more. However, if you use iCloud Music Library or iCloud Photo Library, you will receive a notification that you cannot sync manually.
If you need to sync large files, use the Files tab outside the backup setting. This tab displays all apps that store data locally. You can open each app and drag and drop files to the destination of your choice. Drag and drop files into this window, then select the application you want to use.
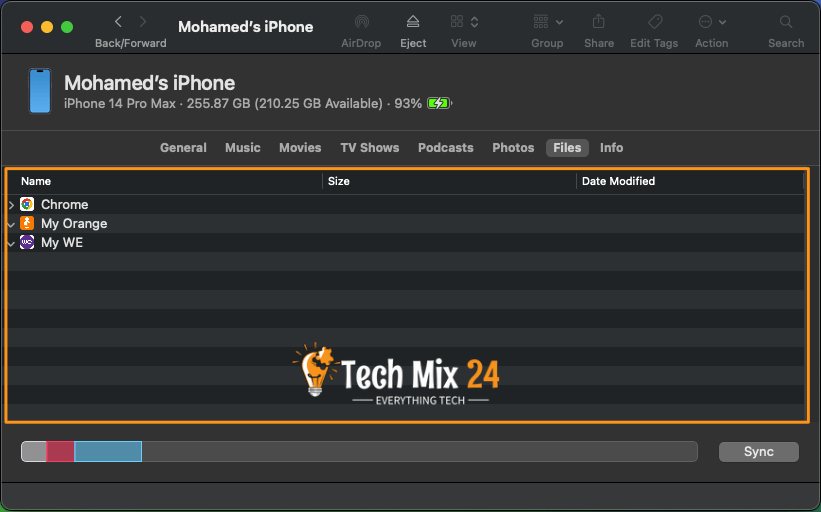
Transferring large files or groups of files can be done much faster. For instance, you can quickly transfer recorded videos using an app like Filmic Pro on your Mac. Similarly, you can share a group of multiple music files to an app like Modizer.
Sync photos and videos with the Photos app on Mac

Organize your photo library by metadata and view recently imported files under the Import section.
How to sync imessage from iPhone to Mac
How to sync messages between iPhone and Mac
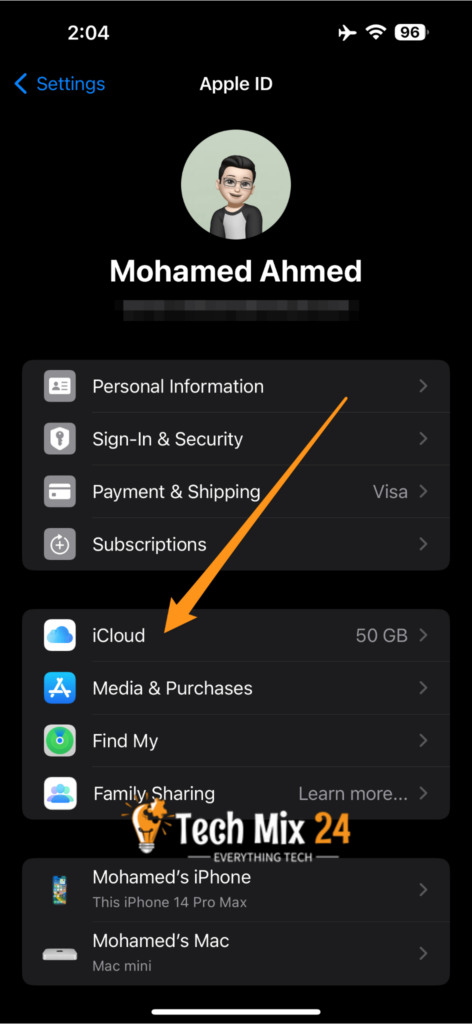
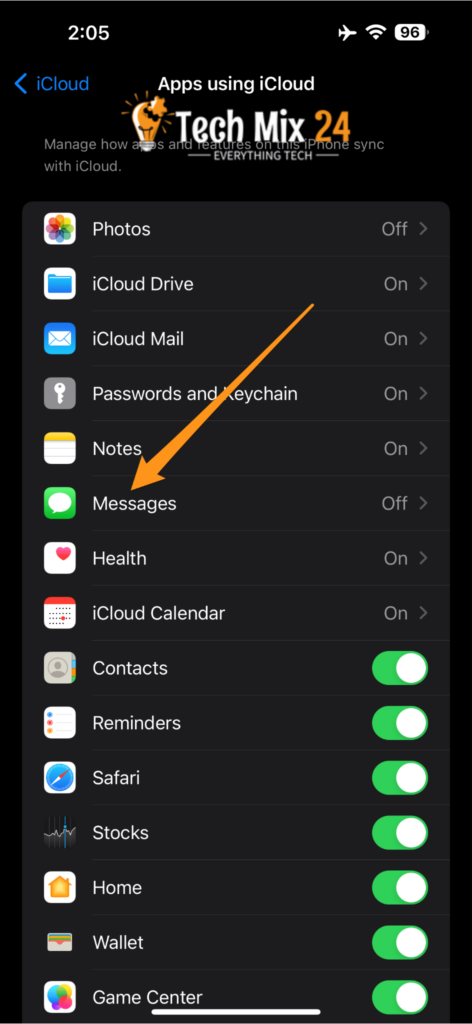
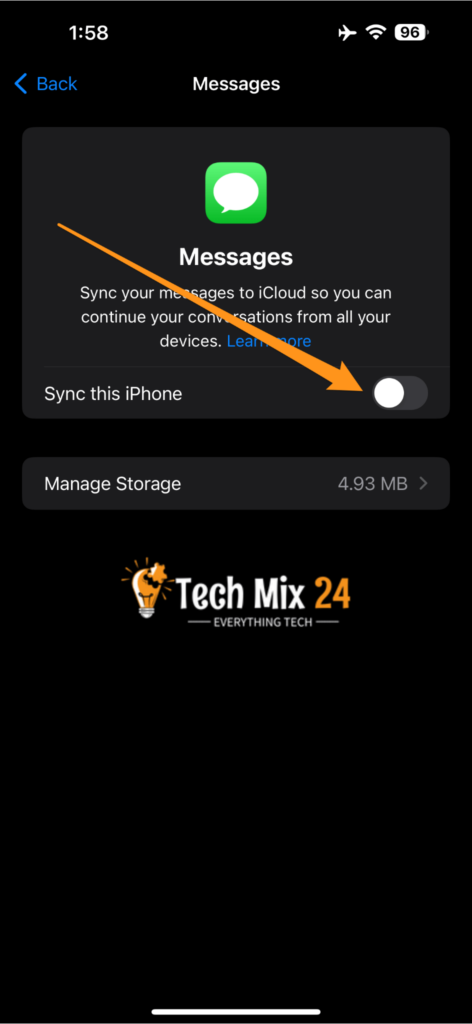
Access iMessage sync by going to Settings, clicking on your Apple ID, selecting iCloud, and toggling iMessage sync.
Why is my iPhone not syncing with my Mac
If your iPhone is not syncing with your Mac, there could be several reasons for this issue. Here are some standard troubleshooting steps to help you resolve the problem:
- Check iCloud Settings:
If you use iCloud for specific data (e.g., photos, contacts, calendars), ensure that your iCloud settings on both devices are set up correctly. - Check Sync Settings:
Review the sync settings in Finder (or iTunes if applicable) to ensure you have selected the content you want to sync (e.g., music, photos, apps). - Check the Cable and Connection:
Use a working USB cable to connect your iPhone to your Mac.
Make sure the cable is correctly connected to both your iPhone and the USB port on your Mac. - Unlock Your iPhone:
Your iPhone needs to be unlocked when connected to your Mac. If it’s locked, unlock it and see if the syncing process begins. - Trust This Computer:
When you connect your iPhone to your Mac for the first time, a prompt will appear on your iPhone asking if you trust this computer. Be sure to tap “Trust.” - Disable Third-Party Software:
Some third-party security or cleaning software on your Mac might interfere with syncing. Try temporarily disabling or uninstalling such software to see if it resolves the issue. - Check for Error Messages:
Look for any error messages or notifications that may appear on your Mac or iPhone when you attempt to sync. These messages can provide clues about the problem. - Reset Network Settings:
If syncing over Wi-Fi, you can try resetting network settings on your iPhone. Go to “Settings” > “General” > “Reset” > “Reset Network Settings.” This will remove Wi-Fi passwords, so be prepared to re-enter them. - Contact Apple Support:
If none of the above solutions work, it may be more complex. Consider reaching out to Apple Support or visiting an Apple Store for assistance.
Following these steps, you can diagnose and resolve the syncing issue between your iPhone and Mac.
How to sync iPhone to Mac – Video
For better results, increase the default iCloud capacity
To achieve better results, it is recommended to increase the default capacity of iCloud. This will allow you to store more data and ensure smoother functioning of the service.
iCloud capacity
You’ll need to subscribe to iCloud for a subscription fee to sync data and apps that need a lot of Storage and space. This includes everything from media like photos and videos, backups of text messages (and associated files), Apple Notes content, backups, and basic cloud file storage.
Automatic and secure end-to-end encryption is applied to your backups, ensuring that all your data is safe in case your device is lost or irreparably damaged. You can easily restore all your data to a new device without losing anything.
Frequently asked questions on. How to sync iPhone with Mac
To sync specific content such as music, photos, or apps, tap on your account, followed by iCloud. Then, select the items you want to sync, such as music, videos, photos, and notes.
Using iCloud, you can sync communication, calendars, and documents between your iPhone and Mac. Activate iCloud on both devices and select the data to sync.
Read also
Conclusion
In conclusion, we can say that syncing iPhone with Mac is an essential process for sharing data and making full use of your devices. You can benefit from a seamless experience between your devices using wireless technologies like iCloud and Wi-Fi Sync. You will find that these processes make your digital life easier and more efficient.
No matter what data or files you need to transfer, you can rely on the available options and choose the one that best suits your needs. Whether you prefer to use iCloud to sync data automatically or transfer files with AirDrop, you’ll find that these easy steps make the process simple and efficient.
Ultimately, these processes give you more control and organization in the world of smart devices and make accessing your content more accessible. Suppose you want to maximize your device experience. Sync iPhone to Mac is the way to go.
