How to remove partition Windows 11
How to remove partition Windows 11
Table of Contents
If you are using Windows 11 and need to modify the distribution of partitions on your hard drive to suit your needs better, you may want to know how to delete a section quickly and safely. In this article, we will provide you with step-by-step instructions on how to use the built-in tools of Windows 11 to delete partitions, giving you complete control over the organization of your hard drive space. By following these simple and safe steps, you can ensure a smooth and efficient user experience.
How to remove partition Windows 11
In the world of computers and the newly released Windows 11 operating system, a need may arise to reshape the hard drive to cater to the user’s requirements. If you wish to delete a partition in this system quickly and conveniently, we have you covered. In this article, we will guide you through deleting partitions in Windows 11 using the system’s built-in tools, giving you complete control over and organizing your hard drive space safely and simply. You can follow our detailed step-by-step instructions to achieve this goal with ease and ensure a smooth and comfortable user experience without any hassle. So, read on to know more!
Related: How to Change Mouse Sensitivity Windows 11
Remove partition Windows 11
As technology continues to evolve, Windows 11 users may encounter the necessity of altering the complex drive structure on their devices. If one seeks to learn how to remove a hard drive partition in Windows 11, this task can be accomplished through a simple and well-organized process. In this context, we will elucidate the steps that can be taken deliberately and dependably, utilizing the system’s built-in tools. By following these steps, one can remove partitions with ease and safety, improving the organization of hard drive space and a more efficient integration of the system.
First, right-click on your Windows 11 icon and then go to Disk Management.
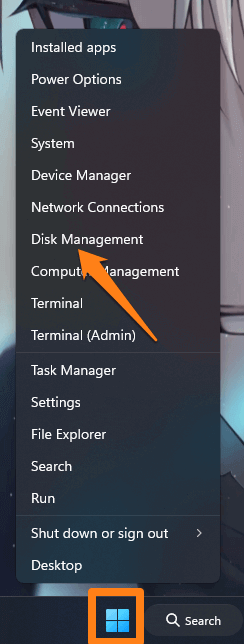
Disk Management will open and show you all the partitions on the disks on your computer. First, select the section.
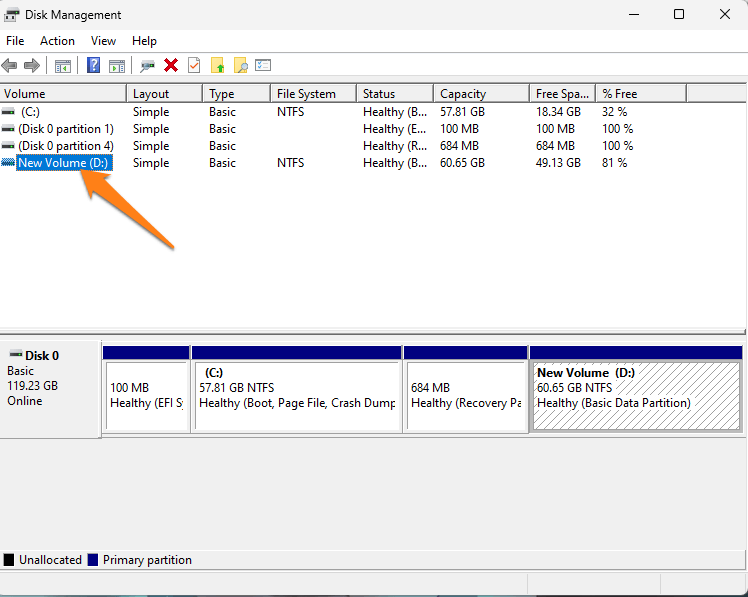
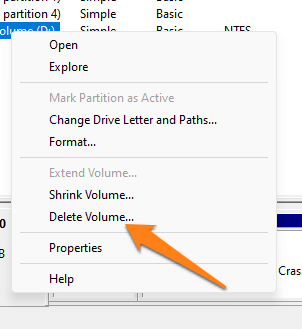
Next, right-click on the partition you want to remove and choose Delete Volume.
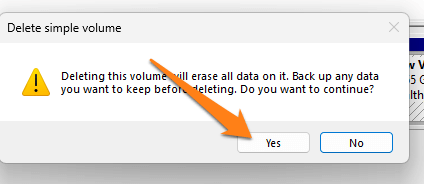
After that, a floating window will appear. Click on Yes.
Note: All files stored in this section will be deleted when this process is performed.
Removing partitions in Windows 11 is now a simplified and efficient task, thanks to the built-in tools. Following the outlined steps, you can confidently and easily organize your hard drive space, optimizing your computer’s performance and integration to suit your specific requirements. Once you have successfully executed these guidelines, you can enjoy a superior user experience and enhanced efficiency without any complications.
Remove the section from the settings
System settings are essential to customize and fine-tune your computer and make it perform optimally for your needs. With the complexity of our software and systems, you may sometimes find unwanted sections that appear in the settings and make things annoying or mysterious. In this section, we will guide you on removing the area you don’t need or want to remove from system settings.
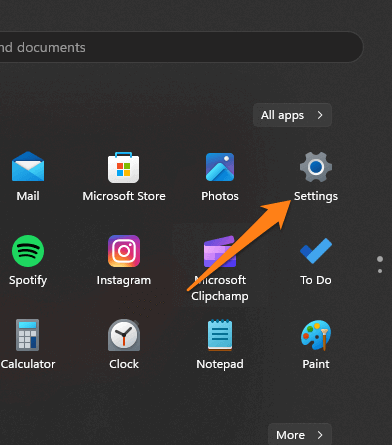
First, click on the Start menu, then click on Settings.
After going to Settings, click on Storage.
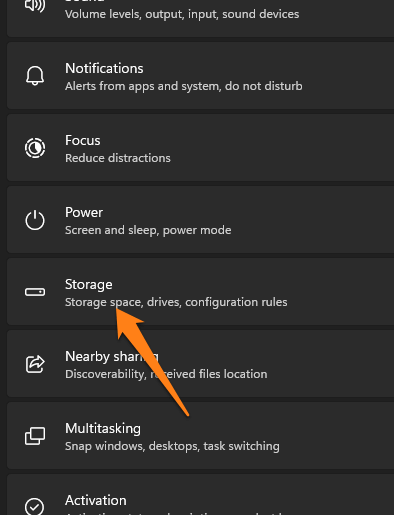
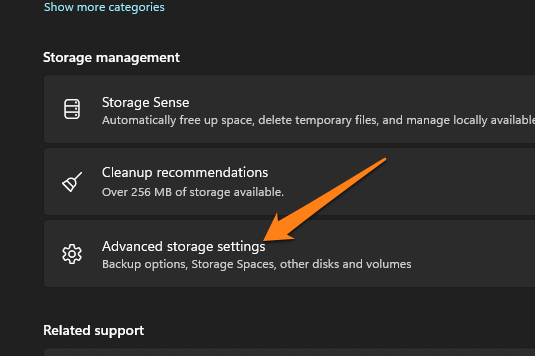
After that, click on Advanced storage settings to show you more options for storage.
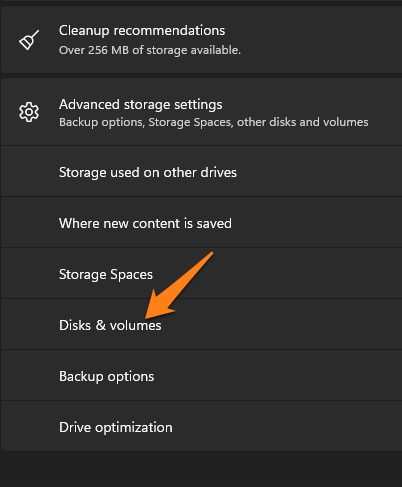
After that, click on Disks and Volumes.
After that, next to the section you want to remove, click on Properties.
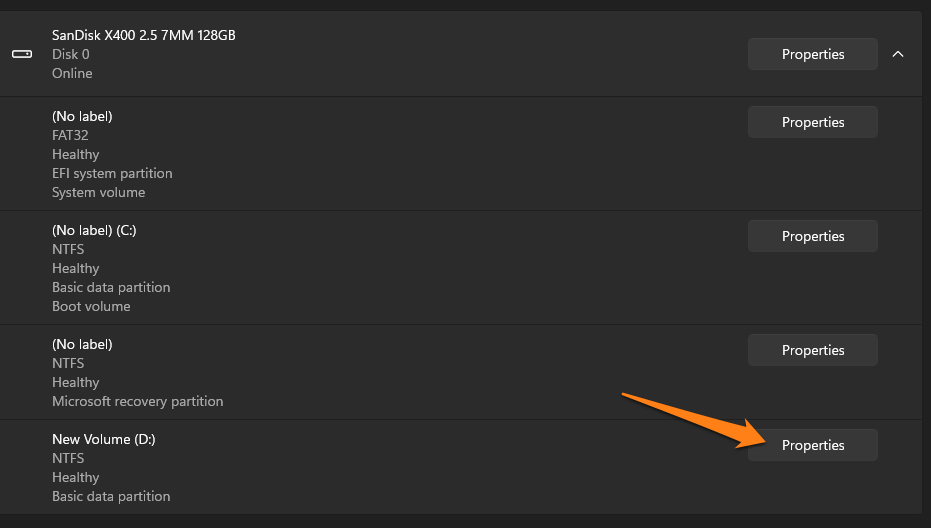
You will be shown the used partition space.
Next, click Delete.
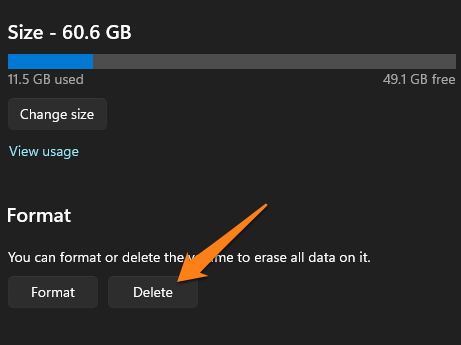
After that, a message will appear in a small window. Click Delete volume.
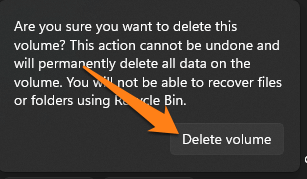
After clicking on Delete volume, the unwanted section will be deleted quickly. But I want to tell you again that when you remove the partition, you will erase everything stored on it, including files, pictures, or other documents. Please be careful before performing this operation. Move essential items from the partition and then remove them.
Why delete the section?
Deleting unnecessary sections simplifies the settings menu, making it easier for users to find and adjust the options that interest them. This reduces clutter and enhances the overall user experience.
Some partitions may contain sensitive information or access to critical system functions. Deleting these sections can enhance privacy and security by reducing access to such features.
Users may wish to customize their device to suit their preferences and needs. Deleting sections that are not used allows for the creation of a more personal settings menu that suits each individual’s requirements.
Unused or duplicate partitions can confuse users, especially if they are irrelevant to their devices or tasks. Deleting these sections helps eliminate confusion and simplify settings.
In some cases, some sections may contribute to system resource consumption or slow application of settings. Deleting them can help improve system performance.
Organizations or administrators can delete partitions to enforce policies, restrict access to particular settings, or ensure uniformity across networked devices.
Conclusion
Removing unused or unnecessary partitions in Windows 11 is a simple cleaning process and a way to customize your device and improve its performance. Through this article, we learned how to remove partitions quickly and safely. We discussed the possible reasons for this, whether for simple menu clarity, increased privacy and security, or personal customization.
It is essential to exercise caution when deleting partitions, as some may contain critical functionality or dependencies. Deleting partitions should be done carefully and with a clear understanding of the potential consequences, and there should be a backup plan in case any problems arise.
Good-bye.

